Last week I relaunched my website and brand identity. If you have been following along on social media you’ll know that I set myself the challenge of completing my rebrand in 2 weeks. Today I’m going to share with you the behind the scenes process that went into creating my branding in the first week.
If you are not familiar with graphic design, you may find a few surprises in this post, because there is a lot more to it than making things look nice. A typical branding project goes through a number of different stages from research, concept development/idea generation, moodboarding, thumbnail sketches, rendering of initial concepts, choosing 1 concept and making any final alterations required.
This was the exact process I followed in branding myself. Surprisingly I found it much harder to brand myself that I do for other businesses. I think when it’s for yourself you have a tendency to overthink things and hesitate making decisions because you doubt yourself. Anyway I soldiered on and now have a brand that I’m pretty happy with.
Ok well that’s enough rambling. Let’s get stuck into the process.
Day 1:
Research
This is the first stage of any design project and is arguably the most important. If you don’t understand the brand, who they are, what they do, who they serve, then the identity will lack substance and will not effectively represent the brand communicate the right message to the target audience.
For me research consisted of me completing the brand questionnaire that I will set for my clients. This questionnaire covers things like who is the brand, what do they do, what is the core messages of the brand, the desired look and feel, the target market.
One of the most important parts of this questionnaire is the section on your target market. In order for me to complete this section of the questionnaire I had to do a bit of research on my target market, to learn more about them so that my branding appeals to them, as well as visually communicates the nature of my brand and it’s core message.
Day 2:
Concept Development
Once I had a good understanding of my business and target market it was on to concept development. There are many different techniques that can be used to help you generate ideas and concepts but my preferred method is brainstorming and word mapping.
In the brand questionnaire I had to identify 5 words to describe the look and feel of my business. I started with those 5 keywords which were spirited, playful, modern, soulful and casual and did a wordmap. For each keyword I wrote down every word related to that word that came to mind. The idea is to just let a stream of consciousness flow onto the page. It doesn’t matter if a word comes to mind during the process that is not directly related to the key word.
By the time I had finished the mind map, I had a much clearer idea of the general design direction because I was able to see connections between words and ideas and how they related to the overall look and feel I wanted for my brand.

Moodboard
The next step was to create an inspiration board which is a collection for images that visually encapsulate the keywords and the look and feel that I was aiming for with my brand. Through my research and concept development I had decided that I wanted something clean and bright with a free spirited feel.
While looking for design inspiration I focused my search on bright images with lots of whites and neutrals, script and handwritten text and clean modern layouts. I also knew that I wanted a pop of bright magenta in my branding mainly because it came to me a couple of nights previously in one of those half dreams you have when you are falling asleep. But it was also in keeping with my overall brand and keywords.

Day 3:
Thumbnail Sketches
By now I had a pretty clear idea of the kind of style I wanted in my logo so I began sketching my initial ideas on paper. The aim is to get all you ideas out so you can see what works and refine your ideas. Often I find that the first few thumbnails are pretty ordinary but as I start sketching more ideas come.

Rendering Initial Concepts
Next it was time for the computer! I chose 3 of my thumnails to develop in Illustrator.
In this case two of my ideas required handwritten brush script so before I got to the computer I literally wrote my name out about 200 hundred times (because I’m such a perfectionist) on paper, experimenting with the Copic Multiliner SP BS pen and the Faber Castell PITT artist pen (brush tip).

Once I had filled the fifth piece of paper I decided that enough was enough. I chose my favourite page and took a photo of it to get it onto my computer where I could then get to work in Illustrator.
I like to work in black and white first and only add colour once I have the design down pat. For my logo I didn’t really want much colour but I did add a very subtle watercolour texture

Finalising My Logo
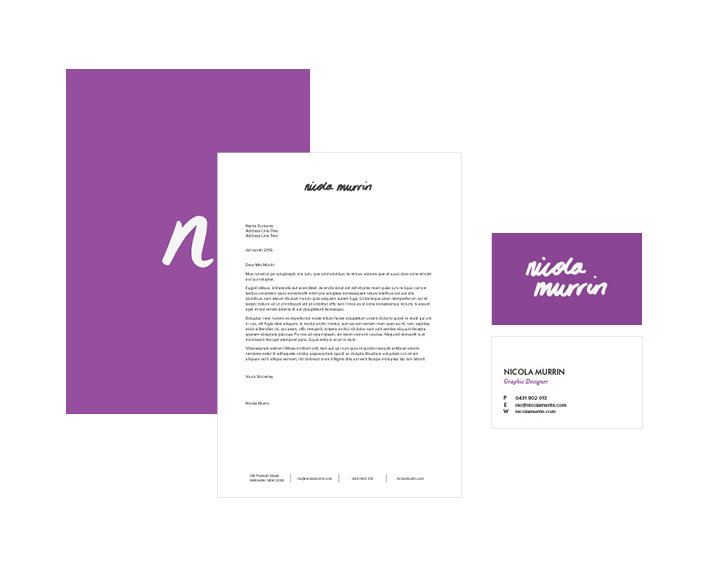
Once I had my three initial concepts I needed to narrow it down to one choice. I chose option 2 because I felt that it best represented the free spirited and creative nature of my brand. I then played around with different arrangements for a stacked version and a sub brand mark to be used for things like my website favicon or when my full logo is not required.
Day 4 - 5:
Brand Style Sheet & Guide
Now that I had a logo I needed to create my brand style sheet which gives a snapshot overview of all my brand elements - logo, logo variations, submarks, colour pallete, fonts and patterns and textures. I already had a good idea of the colour pallete, fonts and textures from my inspiration board
Then I needed to create a brand style guide which goes into more detail on how my branding is to be used. e.g. how and where logos, colours, and textures are to be used and image styles and treatments.

Day 6:
Brand Collateral
With all my branding now in place I then moved on to designing my business cards, letterhead, invoice and quote templates.
Day 7:
Website Copy
During this rebranding process I was wearing two hats. That of the designer and that of the client. In a typical branding project it is up to the client to provide their designer with all the copy that they want on the pages of their website e.g. about page, services page, initial blog posts etc.
So on day 7 I was wearing the client hat and began writing my about page. I didn’t quite get this finished in one day as I had hoped due to the fact that it was a Sunday and I had other chores to fit in to prepare for the week ahead. It also just took longer than expected. If you have ever written an about page before, you’ll know how challenging it is to write about yourself in a way that doesn’t sound sleazy or arrogant.
And that was the first week of rebranding my business in 2 weeks. Next week I'll share with you all the insider goss on week 2 which I spent designing and building my website.